
How to Send Emails from Your Custom Domain Using Gmail for Free
Ready to level up your professional email game? Learn how to easily integrate your custom domain email with Gmail using this step-by-step guide. Send and receive emails seamlessly, all within your Gmail interface! 📨✨ #Gmail #ProfessionalEmail #EmailSetup #EmailIntegration

Prefer a visual guide? Check out our video tutorial below and learn how to set up your professional email in Gmail in just a few minutes!
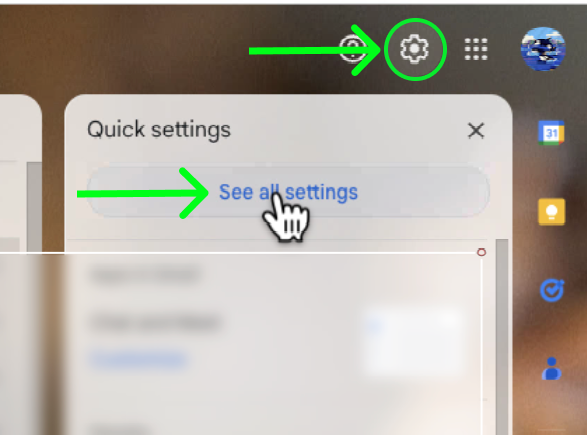
Step 1: Access Gmail Settings
- Open your Gmail account.
- Click on the gear icon in the top right corner.
- Select "See all settings" from the dropdown menu.
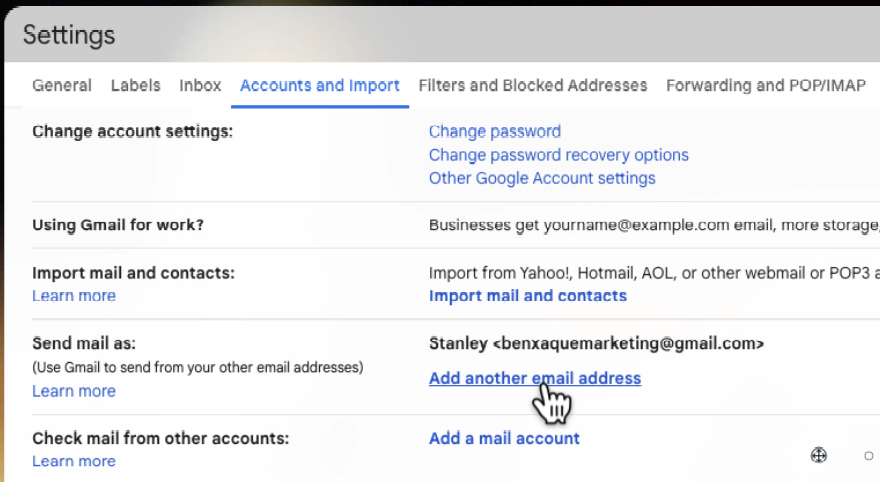
Step 2: Navigate to Accounts and Import
- Go to the "Accounts and Import" tab.
- Scroll down to the "Send mail as" section.
- Click on "Add another email address".
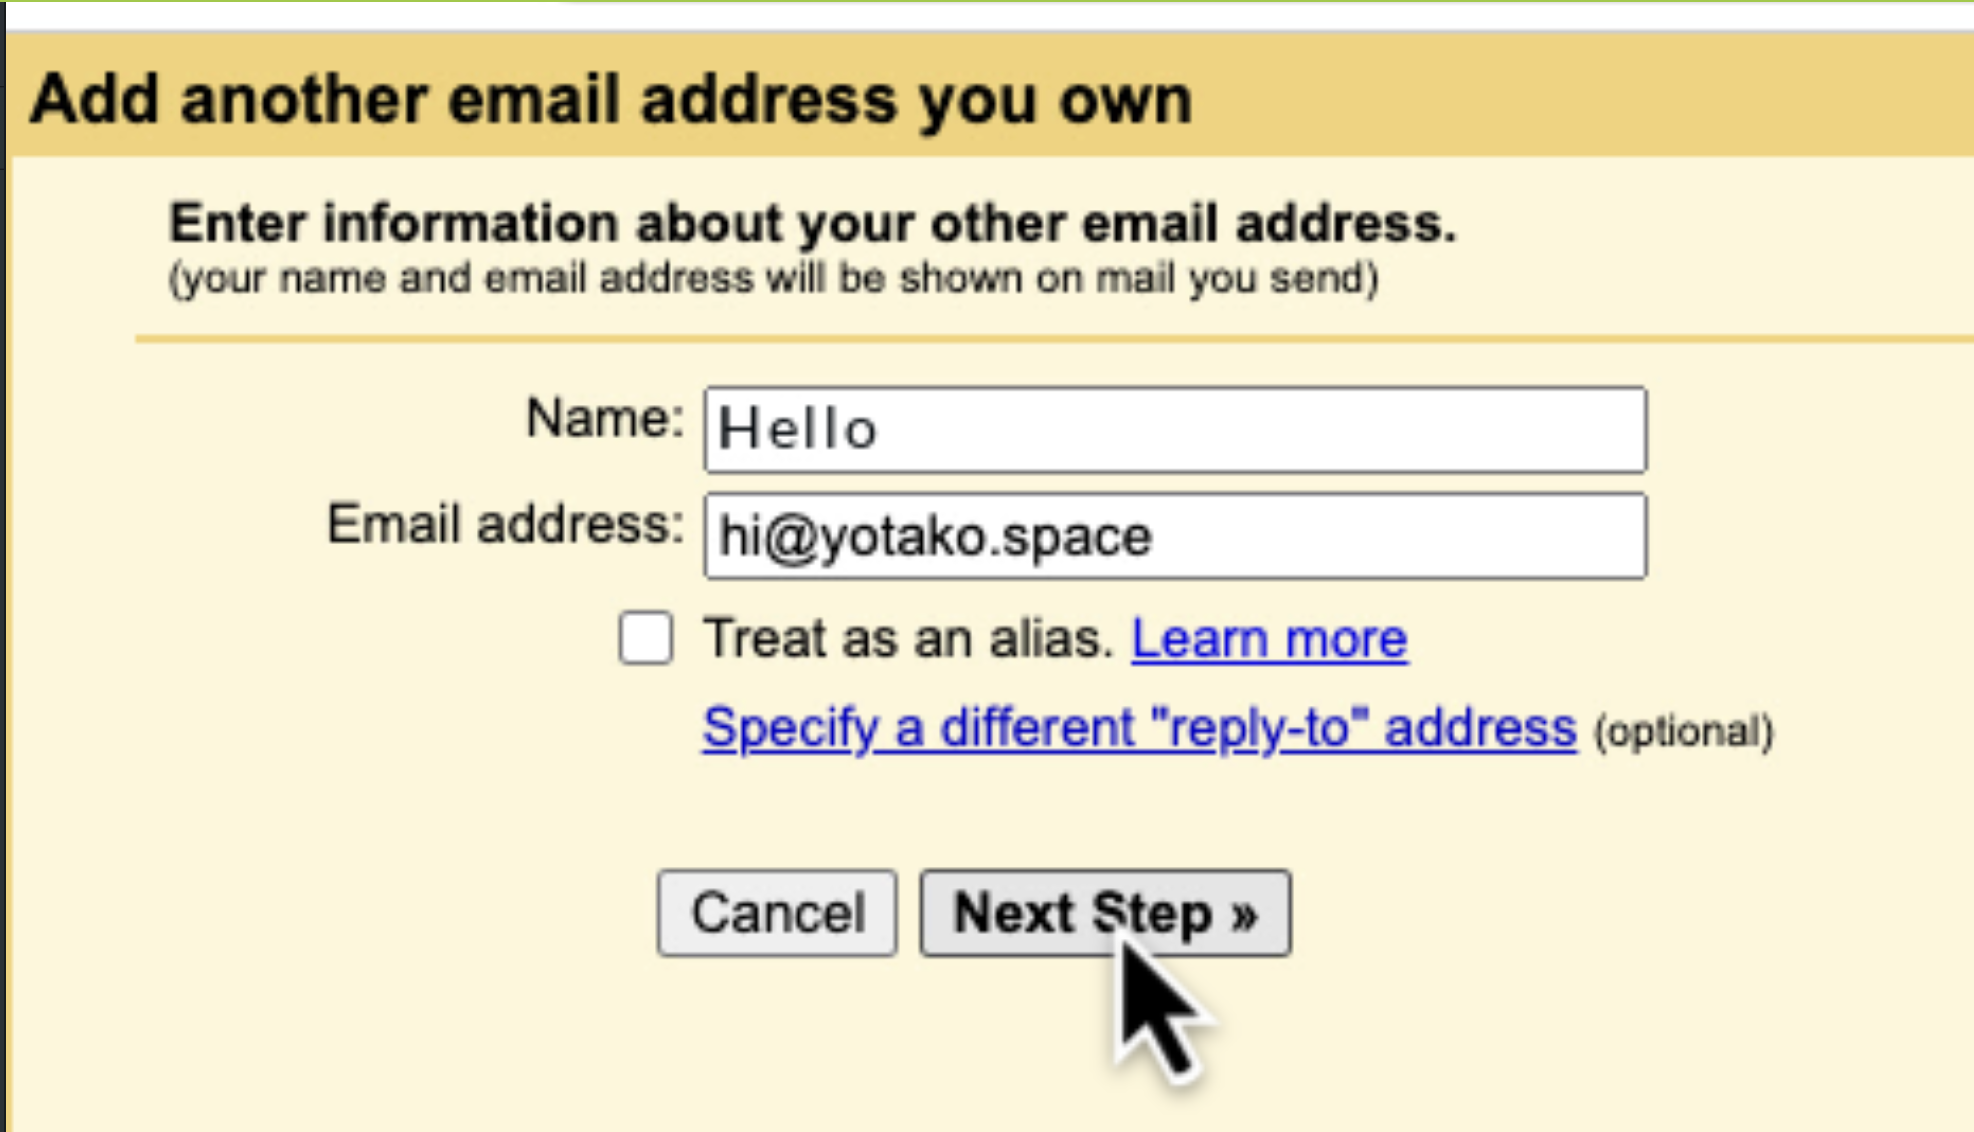
Step 3: Enter Your Professional Email Address
- A new window will pop up. Enter the name as you want it to appear on outgoing emails.
- Enter your professional email address (e.g.,
hi@yotako.space). - Uncheck "Treat as an alias".
- Click "Next Step".
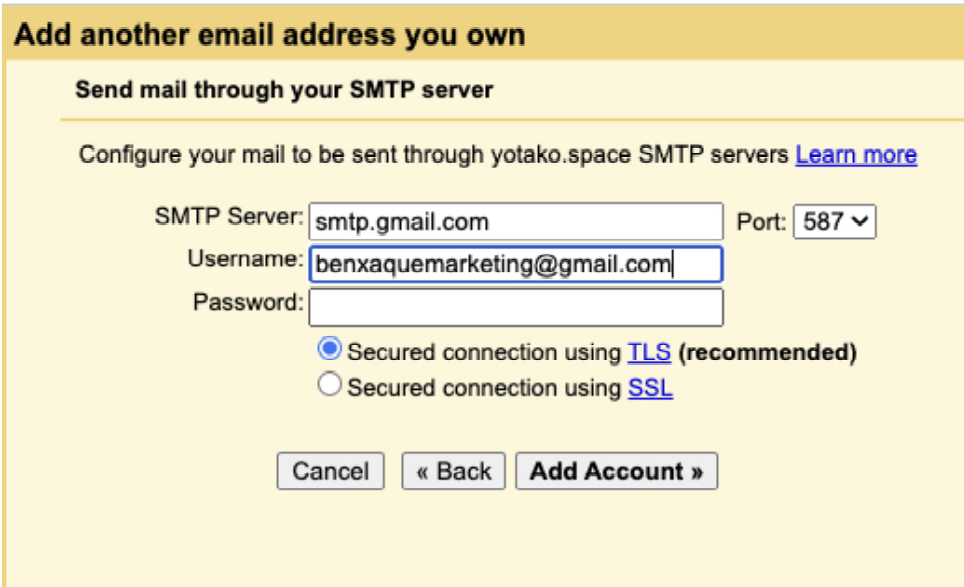
Step 4: Configure SMTP Server Settings
- Enter the SMTP Server:
smtp.Gmail.com. - Enter your Username (The Gmail address you want to link your domain address). For example:
benxaquemarketing@gmail.com. - Enter your password (In the Step 5 I will show you how to create it).
- Select "Secured connection using SSL"
- Set the port to 587..
Step 5: Set Up the Password for Your Professional Email
- Go to your Google Account by clicking on your profile picture and selecting "Manage your Google Account".
- In the Google Account settings, search for "App passwords" in the search bar.
- Click on "App passwords" from the search results.
- Enter your professional email address that you want to link woth Gmail (e.g.,
hi@yotako.space) and click "Create". - Copy the code generated by Google .
Creating the password
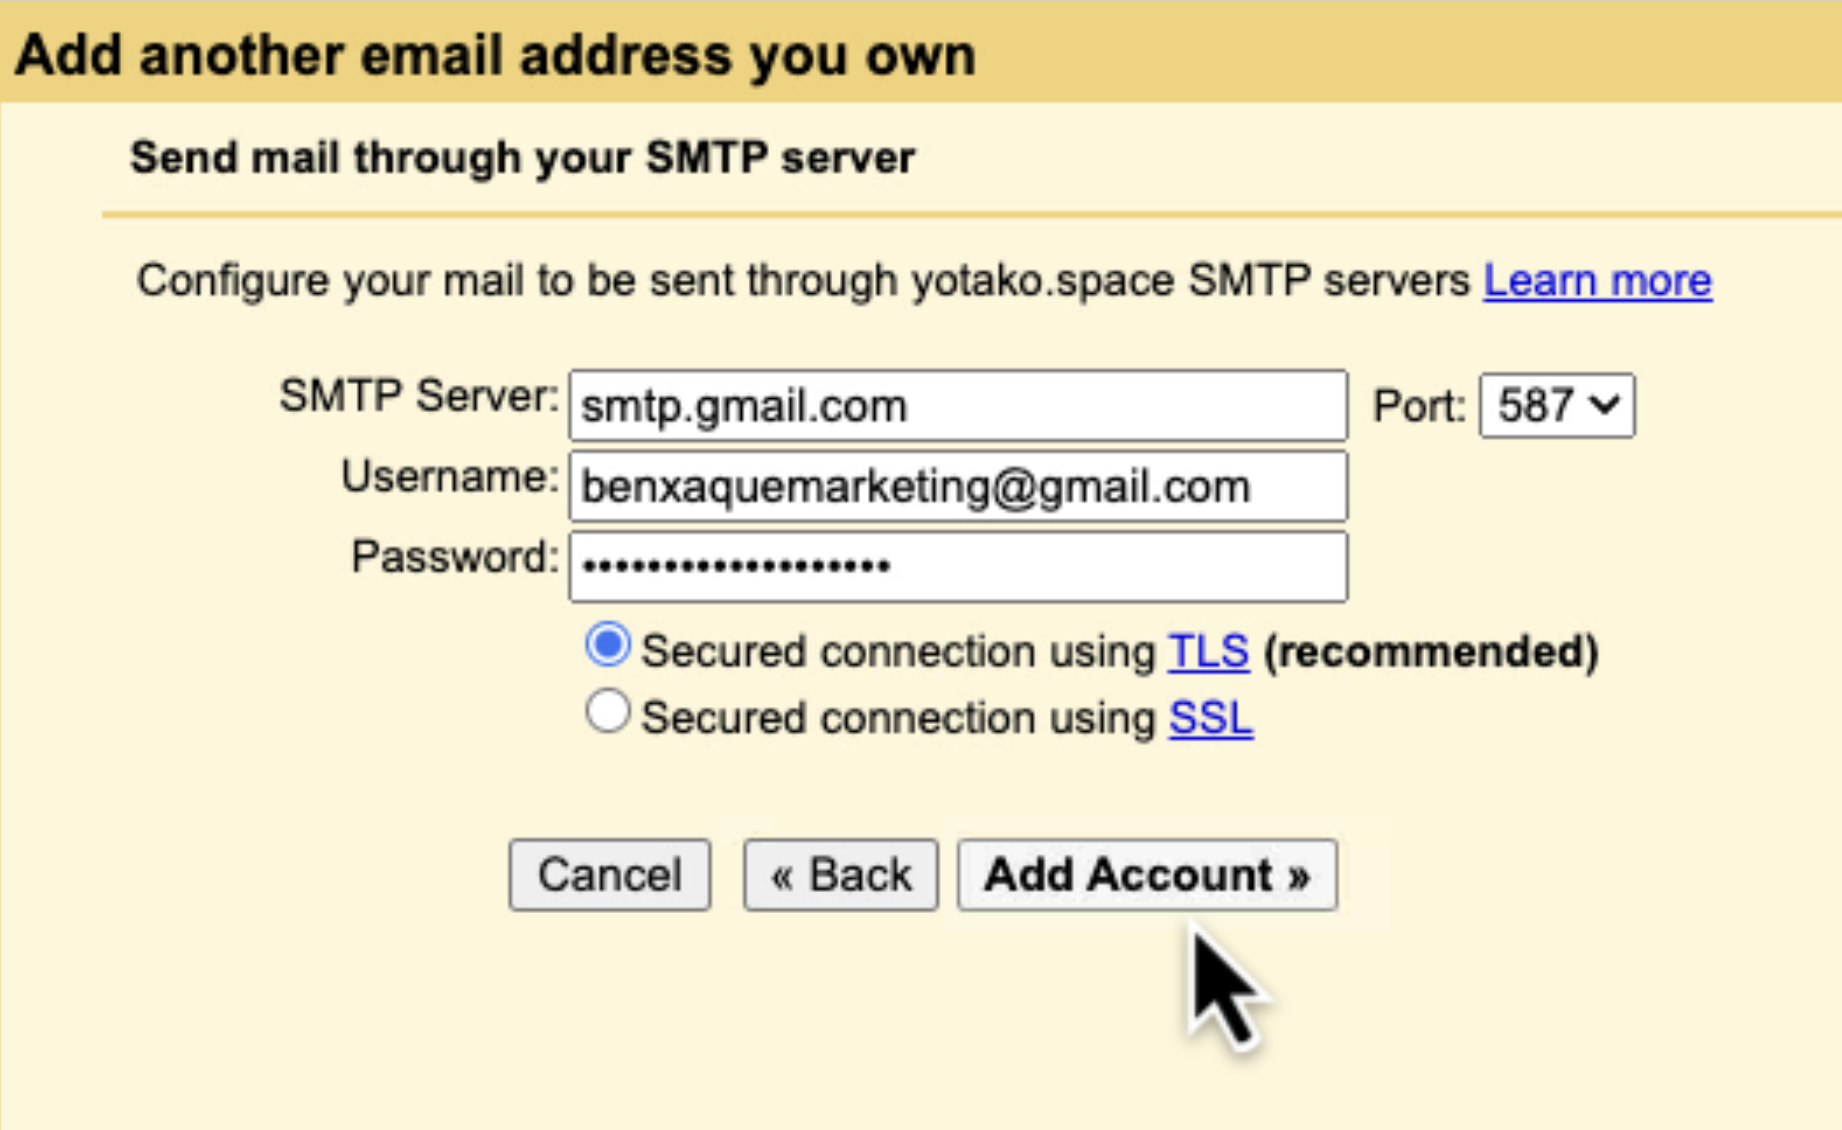
Step 6: Verify Your Professional Email
- Go back to the SMTP configuration window in Gmail.
- Paste the app password into the password field.
- Click "Add Account".
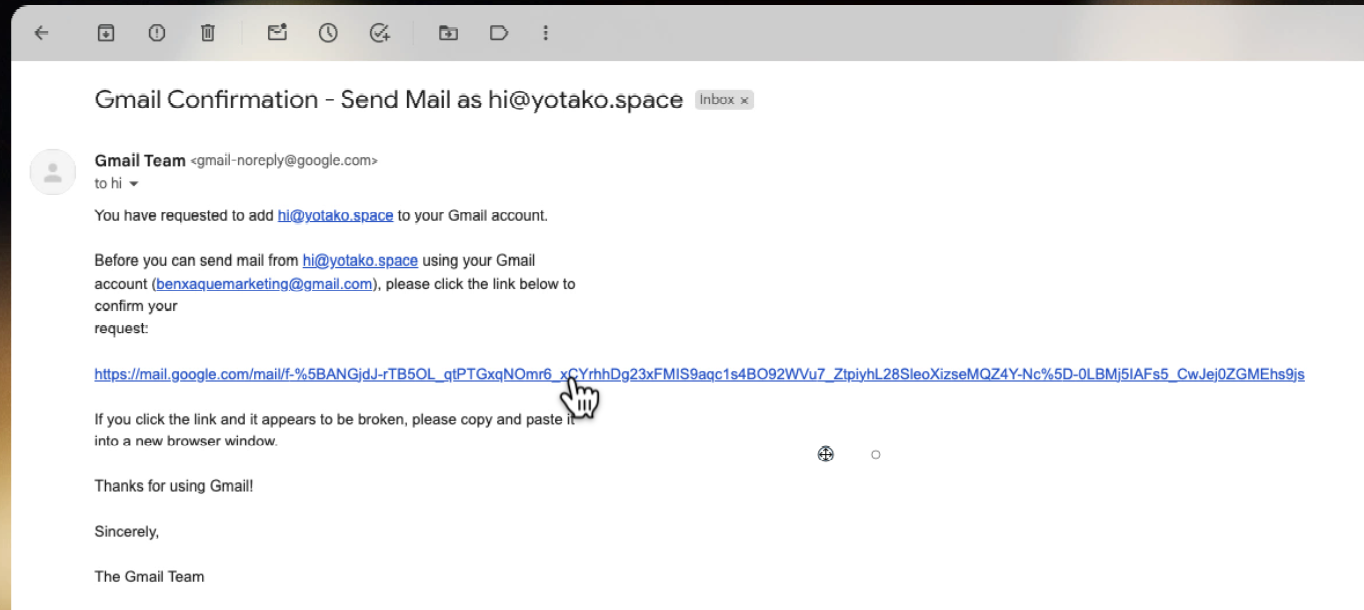
Step 7: Confirm Your Email Address
- Now, go to your inbox, and you should have received a message from the Gmail Team to confirm your setup.
- Open the email and click on the confirmation link provided.
- Click "Confirm" on the redirected page to finalize the setup.
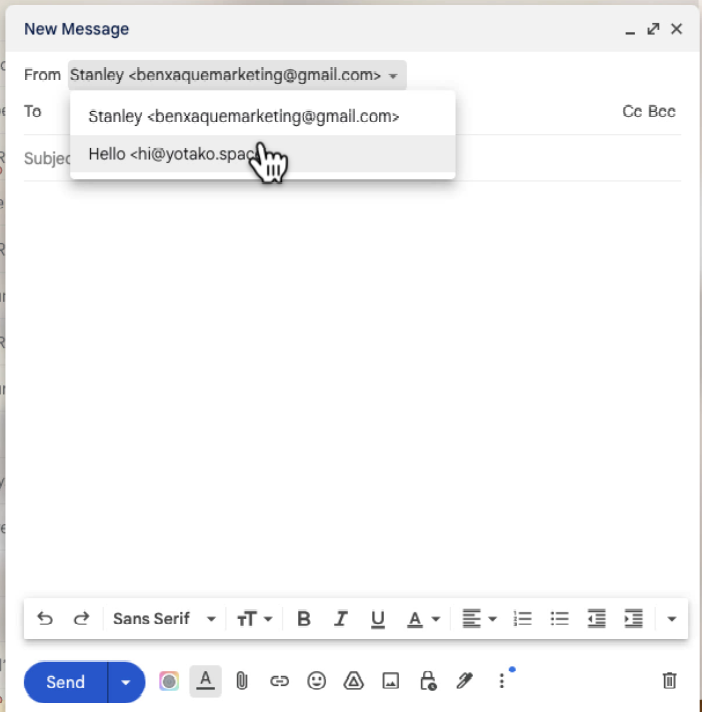
Step 8: Test Your Setup
- Compose: Click "Compose" in Gmail.
- Choose Sender: In the "From" field, select your professional email address (e.g.,
hi@yotako.space). - Send a Test Email: Send an email to yourself to verify that it works!
Conclusion
Congratulations! You have successfully set up your professional email address in Gmail. Now you can send and receive emails using your professional email directly from Gmail.
For more information and to explore the endless possibilities of Yotako, including our powerful plugins with AI Figma to WordPress and WordPress for Adobe XD, visit us at yotako.io. If you have any questions, or suggestions, or simply want to connect with us, please, join our vibrant Yotako community. We look forward to revolutionizing your web design experience!